


Table of Contents
- Why Preserving Family Memories Matters
- Gathering and Organizing Your Physical Items
- Digitizing Old Family Photographs and Documents
- Creating Proper Storage Conditions for Heirlooms
- How to Interview Family Members for History Projects
- Backing Up Digital Files and Managing Your Digital Legacy
- Using Family History Timeline Templates to Document Your Story
- Conclusion: Start Your Preservation Journey Today
Last Updated: August 11, 2026
Why Preserving Family Memories Matters
The stories your family tells, the recipes your grandmother perfected, the letters your parents wrote during wartime, the photographs capturing moments you'll never relive, these are irreplaceable. Yet most families treat them as afterthoughts, tucked into shoeboxes and forgotten in attics. How to preserve family memories has become urgent not because preservation is difficult, but because the window to act is closing. Every year, original photographs fade, documents yellow, and the people who remember the context pass away.
Preservation isn't about creating a museum exhibit. It's about honoring the people who came before you and giving the next generation access to their real stories, not sanitized versions, but the actual voices, handwriting, and choices that shaped your family. At Treasure Charms, we understand that meaningful gifts often commemorate these family narratives. When you create something personalized to celebrate your loved ones, you're already thinking about legacy. Preservation is the next step: ensuring those memories survive long enough to matter.
The challenge isn't finding a perfect system. It's starting somewhere, building momentum, and staying consistent. Most families never finish because they wait for the ideal conditions that never arrive. This guide breaks preservation into manageable steps you can begin this week, with tools you likely already own.
Gathering and Organizing Your Physical Items
Start by collecting everything scattered across your home. This means pulling out boxes from basements, searching filing cabinets, checking desk drawers, and asking relatives if they're holding anything. Physical items include photographs (prints, slides, negatives), letters and postcards, documents (birth certificates, marriage licenses, military records), newspaper clippings, journals, ticket stubs, old greeting cards, and family artifacts like jewelry or heirlooms.
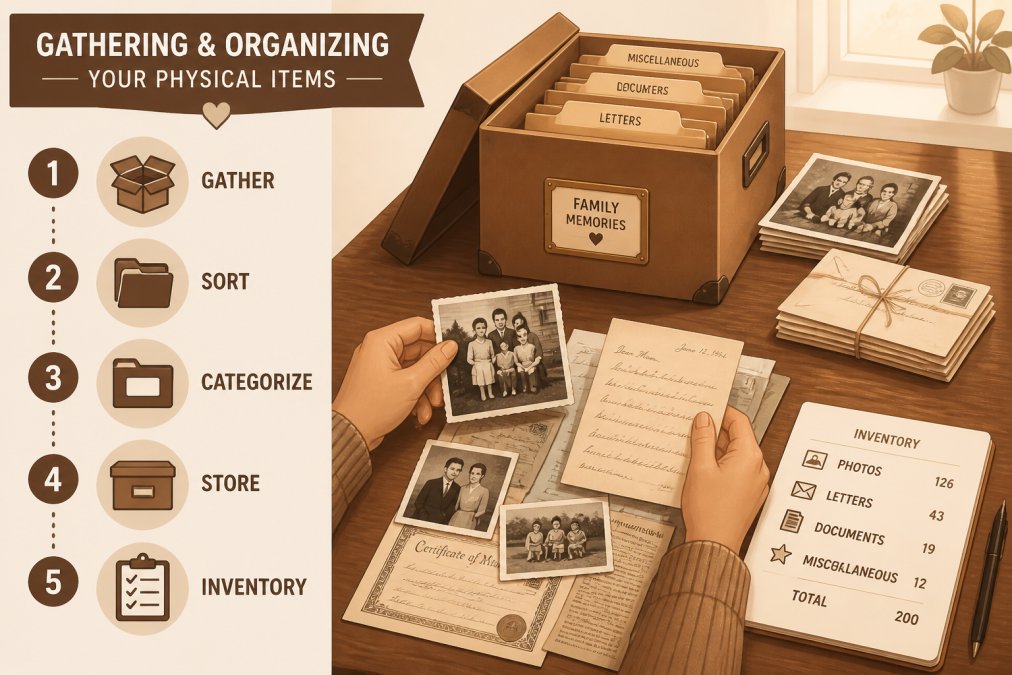
The organization step separates what matters from what doesn't. Create three piles: keep, scan, and discard. Be honest about what actually holds meaning. A blurry photo of someone you don't recognize may not be worth preserving. Duplicate prints of the same moment can be consolidated. Once you've narrowed your collection, sort the keepers by category: photographs, documents, letters, and artifacts. Within each category, arrange by date if possible, even rough groupings by decade help when you're digitizing later.
Use a simple spreadsheet to log what you have. Include columns for item type, approximate date, people pictured or mentioned, current condition, and location. This inventory becomes invaluable when you're ready to digitize or when family members ask where something is. The act of cataloging also forces you to notice patterns: which relatives appear most often, which time periods are well-documented, which gaps exist.
Store your physical collection in a cool, dry place for now, not the attic (temperature swings damage photos) or the basement (moisture is a destroyer). A closet, cabinet, or under-bed storage works temporarily. You'll move everything to proper archival-safe conditions later, but gathering and organizing is the foundation that makes the rest possible.
Digitizing Old Family Photographs and Documents
Digitizing old family photographs and documents is the insurance policy for your memories. Once in digital form, your photos survive hard drive failure through backup. They become searchable. They can be shared with relatives without risking the originals. The process doesn't require expensive equipment, a smartphone camera and a scanning app handle most needs.
For photographs, start with prints. Use a flatbed scanner at 600 DPI minimum; 1200 DPI captures more detail if you're scanning old or small prints. Smartphone scanning apps work in a pinch but sacrifice quality. Lay the photo flat, ensure even lighting, and scan without the glass cover if the photo is fragile. Save each scan with a descriptive filename: "1985_Grandpa_Birthday_Party.jpg" tells you far more than "Photo_001.jpg."
Slides and negatives require different handling. A dedicated slide scanner captures the image without damaging the original, but these devices cost more. An alternative: take high-resolution photographs of slides against a light source, or have a local photo lab scan them for a fee. Negatives are more delicate, handle them only by the edges, and consider professional scanning to avoid damage.
Documents need the same care. Scan birth certificates, marriage licenses, military discharge papers, and old letters at high resolution. OCR (optical character recognition) software can make scanned text searchable, which helps when you're looking for a specific name or date years later. For handwritten documents, OCR is less reliable, but the high-resolution scan preserves what you need.
Create a consistent folder structure on your computer: Year > Month > Event or Person. This system scales as your digital archive grows. Use metadata, the hidden information embedded in image files, to tag photos with dates, locations, and names. Tools like Lightroom or even free options like Picasa help organize large photo collections.
Creating Proper Storage Conditions for Heirlooms
Physical items degrade. Acid in paper causes yellowing and brittleness. Humidity breeds mold and warping. Light fades colors. Temperature swings crack photographs. Proper storage conditions slow these processes dramatically.
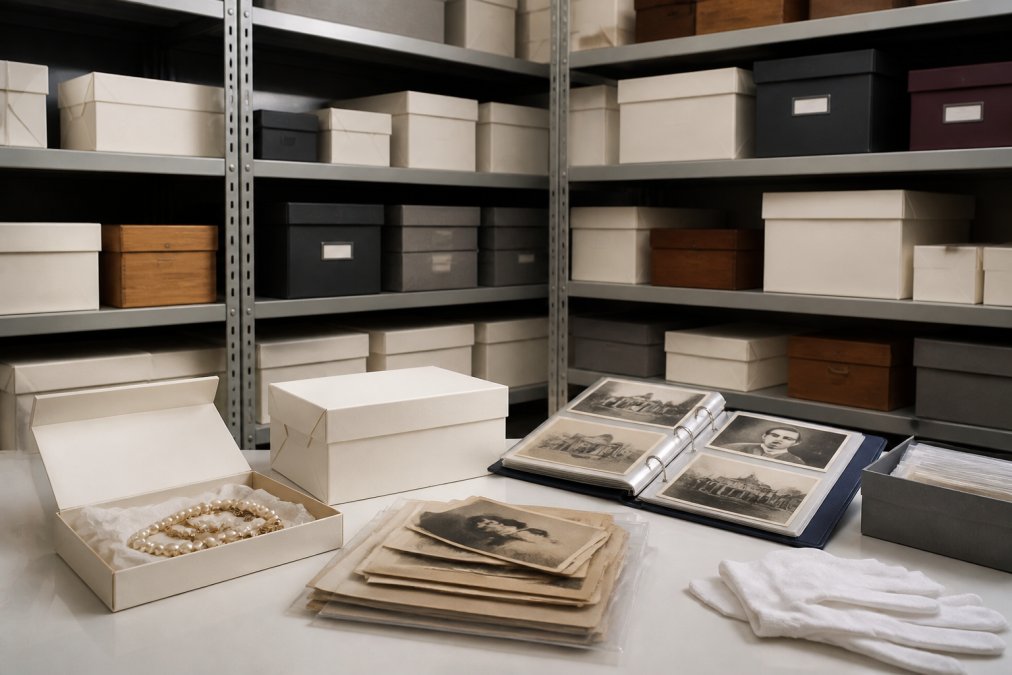
The ideal environment maintains 65-70 degrees Fahrenheit and 30-40% relative humidity. Most homes fluctuate beyond this range seasonally, so focus on stability rather than perfection. Avoid basements (moisture), attics (heat swings), and garages (temperature extremes). A climate-controlled closet, interior cabinet, or spare bedroom works well.
Invest in archival-safe storage materials. Acid-free boxes, acid-free folders, and negative sleeves cost more than regular cardboard but preserve contents for decades instead of years. Never use rubber bands, paper clips, or regular envelopes, these corrode and stain photographs. Interleave photographs with acid-free tissue to prevent sticking.
For valuable items like jewelry, documents, or photographs with sentimental weight, consider a safe deposit box at a bank. This protects against fire, theft, and water damage. Store originals there and keep digital copies at home. Some families split storage: originals in a safe deposit box, working copies digitized and stored at home.
Label everything clearly but gently. Use pencil on the back of photographs (pen ink can bleed through). For documents, use archival labels. Create an inventory list that lives outside the storage area, if something happens to your collection, the list helps you remember what was there.
How to Interview Family Members for History Projects
The stories matter as much as the photographs. How to interview family members for history projects transforms memories from isolated images into narratives with context, emotion, and meaning. Your grandmother's photograph of a 1950s kitchen tells you what it looked like. Her voice describing how she made Sunday dinner tells you who she was.
Schedule interviews when relatives are relaxed, not rushed. A 30-minute conversation beats a chaotic family gathering where everyone's talking at once. Ask open-ended questions: "Tell me about your childhood home" works better than "Did you like school?" Open questions reveal what relatives consider important, not what you think matters.
Bring photographs to the interview. Pointing at a picture jogs memory and gives the conversation focus. Ask about people pictured: their names, relationships, what they were like. Ask about the setting: what was happening in the world then, what was the neighborhood like, what did people do for fun. Ask about emotions: what made them happy, what worried them, what did they wish they'd done differently.
Record the interview if possible, audio on your phone is fine. Taking notes while someone talks forces them to pause, breaking the flow. A recording captures tone, pauses, and laughter. Transcribe key parts later. Even rough transcripts become precious when the person is no longer here to tell the story.
Ask about family recipes, traditions, and inside jokes. These details humanize your ancestors. A recipe card in someone's handwriting paired with their voice describing how they made it becomes a living archive. Traditions connect generations, knowing why your family celebrates something a certain way links you to decades of practice.
Create a simple family tree as you interview. Who married whom, when were children born, what were the migrations and moves. These facts seem obvious when relatives are alive but become mysteries quickly when they're not.
Backing Up Digital Files and Managing Your Digital Legacy
Your digital archive is only as safe as your backup strategy. A single hard drive is a single point of failure. A house fire, water damage, or device failure erases everything. The 3-2-1 backup rule protects against this: keep three copies of important files, on two different media types, with one copy stored off-site.
Start with your primary copy on your computer or external hard drive. Make a second copy on a different external drive stored at home. Make a third copy in cloud storage, Google Drive, Dropbox, or iCloud, stored off-site. This redundancy means losing any single copy doesn't destroy your archive.
Cloud backup also solves the problem of device obsolescence. Hard drive formats change. File types become unreadable as software evolves. Cloud services maintain compatibility across decades, automatically updating formats so your files remain accessible. A JPEG saved today will still open in 20 years on whatever device exists then.
Organize your digital files with a clear naming convention and folder structure. Use YYYY-MM-DD format for dates in filenames so files sort chronologically. Include descriptions: "1985-06-15_Grandpa_Birthday_Party_Backyard.jpg" is immediately clear. Avoid generic names like "Photo1" or "Image."
Document your digital legacy for your family. Create a password-protected document listing where your files are stored, how to access them, and who should inherit them. Include instructions for accessing cloud accounts, external drives, and any password managers. This prevents your digital archive from becoming inaccessible after you're gone.
Consider a digital legacy service that manages access to your accounts after death. These services can share photos with family, preserve your social media, or delete sensitive content, whatever you choose. Set this up now while you can control the outcome.
Using Family History Timeline Templates to Document Your Story
A timeline gives structure to scattered memories. Family history timeline templates help you organize events chronologically and see patterns you might otherwise miss. A timeline shows when relatives migrated, when major life events happened, and how your family's story intersects with historical events.
Create a basic timeline in a spreadsheet or document. Include columns for year, event, person involved, and notes. Start with major milestones: births, marriages, deaths, moves, career changes. Add historical context: wars, economic shifts, cultural moments. Seeing your grandmother's birth year next to "Women gain voting rights" or "World War II begins" connects personal history to the larger world.
Timeline templates also reveal gaps. If you have photos from 1950 but nothing from 1960, that gap tells you to ask relatives about those missing years. What happened then? Why are there no memories recorded? Sometimes the gaps themselves are significant, a period of hardship, a family conflict, a time of transition.
Share your timeline with family members. Ask them to add events you've missed or correct dates you've guessed at. A collaborative timeline becomes a family project that engages multiple generations. Younger relatives see the arc of your family's story. Older relatives feel their experiences are valued and remembered.
Use the timeline to plan future interviews and research. If a relative mentions an event you can't place, add it to the timeline and investigate. Did something happen in the broader world that affected your family? Connecting personal events to historical context makes your family story richer and more meaningful.
Preserving family memories isn't a project you finish. It's a practice you build over time. Start this week by gathering one box of photographs or one stack of letters. Spend an hour organizing what you find. Schedule a 30-minute conversation with someone older in your family and record it. Upload your digital photos to cloud storage. These small actions compound. Six months from now, you'll have a meaningful archive. In a year, you'll have a legacy.
At Treasure Charms, we create personalized gifts that celebrate the people and moments you want to remember. Whether it's a custom charm bracelet honoring family milestones or a personalized plaque displaying names and dates that matter, these keepsakes work best when paired with the stories behind them. Preserve those stories first. The keepsakes will mean infinitely more when they're anchored in documented memory.
Your family's history deserves to survive. Begin today.
Frequently Asked Questions
What is the best way to digitize old family photos and documents?
Start with a scanner that captures at least 600 DPI resolution for photographs and 300 DPI for documents. Organize scanned files by date or family member using clear naming conventions. Store originals in archival-safe boxes and save digital copies to multiple locations, external hard drives, cloud backup services, and at least one offline source. This creates data redundancy and protects against loss from hardware failure or digital disasters.
How do I preserve family memories without feeling overwhelmed?
Break the project into phases. Start by gathering items from one area or time period, then digitize and organize those before moving to the next batch. Create a simple system: assign each family member or era a folder, use consistent naming conventions, and document provenance (who owned it, when, why it matters). Set a realistic timeline, even one hour per week adds up. Remember, imperfect preservation is better than no preservation.
What storage conditions keep photographs and documents safe long-term?
Store items in archival-safe, acid-free boxes at 60-70°F with 30-40% relative humidity. Avoid basements (moisture), attics (temperature swings), and direct sunlight. Use negative sleeves for old film and polyester sleeves for fragile paper. Keep delicate items like old letters in individual acid-free folders. Avoid rubber bands, paper clips, and bulky fasteners that damage surfaces. Check stored items annually for signs of mold or deterioration.
How can I record family stories from elderly relatives?
Plan informal interviews around one or two specific topics, their childhood, a particular relative, or a memorable event. Use a smartphone or simple audio recorder; video captures expressions and emotion. Ask open-ended questions ('Tell me about your grandmother') rather than yes-or-no questions. Let them talk without interrupting. Record the date, location, and the person's name. Transcribe key parts or store audio files with clear metadata. This oral history becomes invaluable family narrative when combined with photographs and documents.
What is the difference between cloud backup and physical storage for family archives?
Cloud backup (encrypted online services) offers convenience, automatic redundancy, and protection from physical disasters like fire or flooding. Physical storage (external drives, archival boxes) gives you control and doesn't depend on subscription fees or company viability. The best approach uses both: store original documents in acid-free archival boxes in your home, keep digital copies on an external hard drive, and back up critical files to a reputable cloud service. This multi-layered approach ensures your family memories survive any single point of failure.
How do I label and catalog heirlooms so future generations understand their significance?
Create a simple inventory spreadsheet with columns for item description, date acquired, previous owner, and its story or significance. Attach archival-safe labels with pencil (not ink) to items when possible. Photograph each heirloom with its label visible. Store the catalog digitally and in print. Include provenance information, who owned it before you, where it came from, why it matters. This metadata transforms a collection of objects into a documented family legacy that tells the story behind each piece.
What budget-friendly tools can help me preserve family memories?
A smartphone camera and free cloud storage (Google Photos, OneDrive) cover basic digitization. For better results, borrow or rent a scanner from your library. Acid-free archival boxes are inexpensive at office supply stores. Free tools like Ancestry.com's basic features or FamilySearch help organize genealogy. A simple spreadsheet tracks inventory. Prioritize spending on archival-safe storage materials for irreplaceable items, then invest gradually in better scanning equipment as your budget allows. Many libraries also offer free digitization services for family documents.
This article was written using GrandRanker


